This guide outlines the procedure to apply auto backup settings for SOLIDWORKS file.
1. In your computer, launch SOLIDWORKS.

2. At the app’s top bar, click on ‘Settings’ (gear icon).
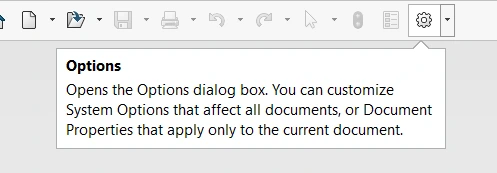
3. System Options – General window will open.
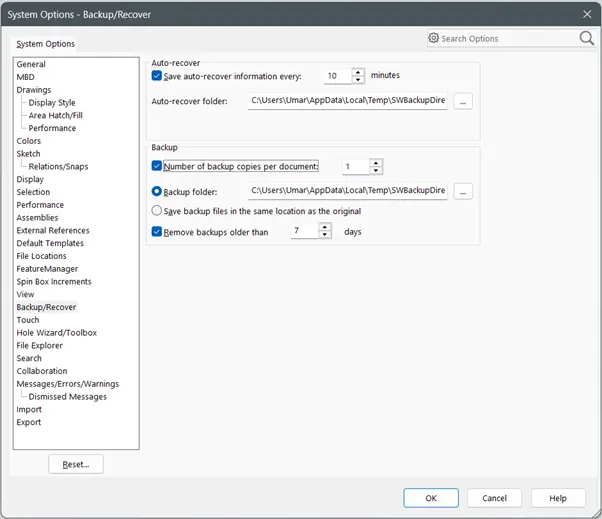
a. Click ‘Backup/Recover’.
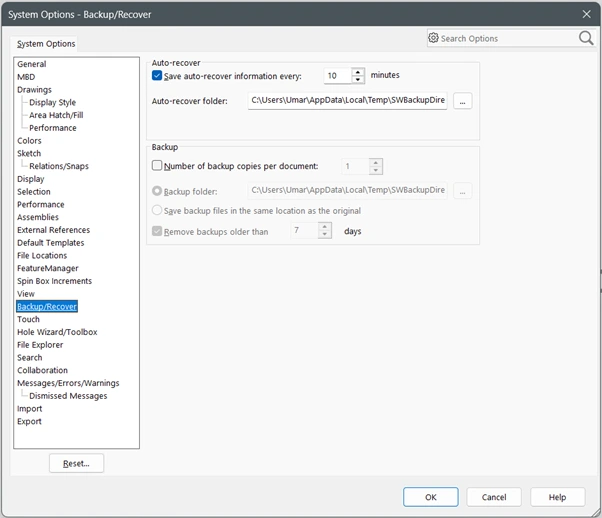
4. Choose ‘Number of backup copies per document:’.
a. Click ‘OK’ to apply the settings.
Note:
- You can configure SOLIDWORKS to automatically save multiple backup copies of each document, up to a maximum of 10.

- You also have control over where these backup files are stored. Each time you save your work, SOLIDWORKS creates a backup.
- Lastly, to manage disk space, you can set an automatic deletion schedule for backup files older than a specified date.
5. Your auto backup settings for SOLIDWORKS file is now successfully applied.
If you encounter an issue while applying auto backup SOLIDWORKS file settings, you may contact [email protected] for assistance.
If you want to learn more about common questions, you can browse the FAQ from SOLIDWORKS here.
If you found this helpful, we’d love for you to share it!


