What is a SolidCAM Network Dongle License?
A SolidCAM Network Dongle License is a hardware-based security device that allows multiple users within a network to access SolidCAM software. Instead of each computer requiring its own dongle, a single network dongle is used to manage licenses centrally on a server. This dongle can allocate licenses dynamically to client computers over the network.
Why Use a SolidCAM Network Dongle License?
- Centralized License Management: Simplifies license management by centralizing control. All licenses are managed from a single server, reducing the administrative burden of managing multiple dongles.
- Cost Efficiency: More cost-effective for organizations with multiple users. Instead of purchasing individual licenses for each user, a pool of licenses can be shared among users.
- Flexibility: Provides flexibility for users to access SolidCAM from any computer within the network, if a license is available.
- Scalability: Easily scalable as the organization grows. Additional licenses can be added to the network dongle as needed.
How to Install SolidCAM Network Dongle for Client
Step 1: Set Up the Network Dongle Server
1. Insert the Dongle: Insert the SolidCAM network dongle into a USB port on the server machine.
2. Install Dongle Driver: Download and install the necessary dongle drivers from the SolidCAM website or the dongle manufacturer’s website.
3. Install License Manager: Download and install the SolidCAM License Manager on the server. This can typically be found on the SolidCAM installation media or website.
4. Configure the License Manager: Open the SolidCAM License Manager and configure it to recognize the network dongle. Ensure that the license manager service is running and set to start automatically.
5. Configure Firewall: Configure the server’s firewall to allow communication on the ports used by the SolidCAM License Manager (usually port 1947).
Step 2: Set Up Client Computers
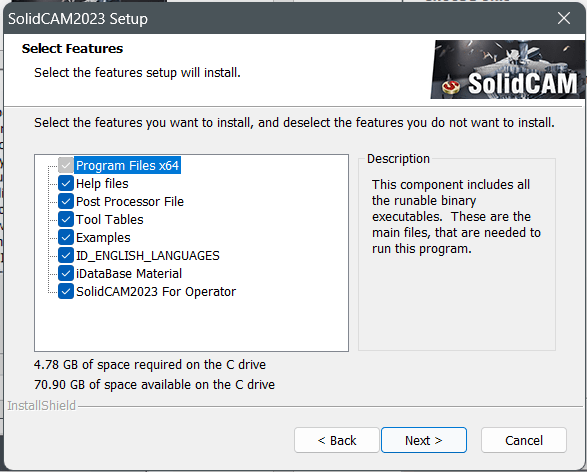
1. Install SolidCAM: Install SolidCAM on the client computers. During installation, select the network licensing option.
a. Copy and run the installer with administrator’s permission.
b. Select Next on SolidCAM20XX Setup.

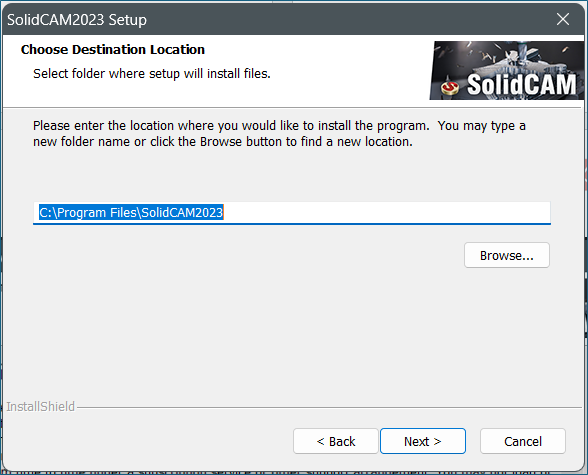
c. Choose the location to install SolidCAM (default is suggested) and click Next.
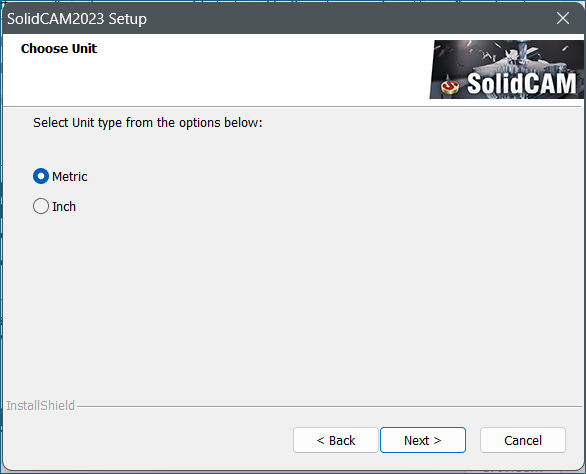
d. Select default units and click Next.
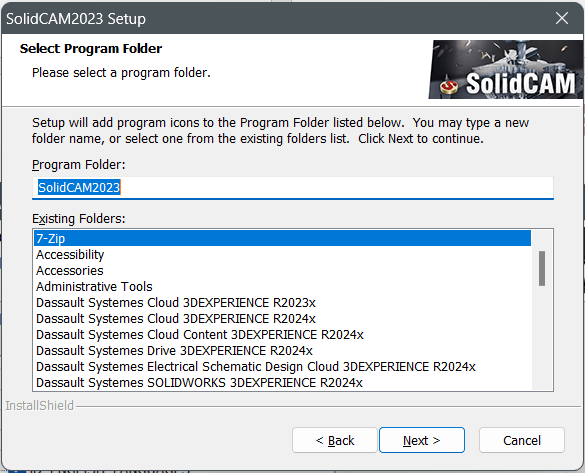
e. Select or name a program folder and click Next.
f. Wait until the license driver installation is complete.
g. Launch SOLIDWORKS and activate the SolidCAM Add-ins.
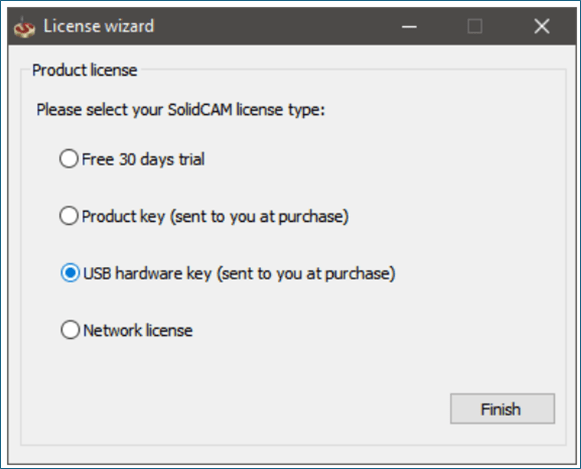
h. If prompted to choose a type of license, choose ‘Network license‘.
2. Configure Network License: Open SolidCAM on the client computer and go to the License Manager settings. Enter the IP address or hostname of the server where the network dongle is installed.
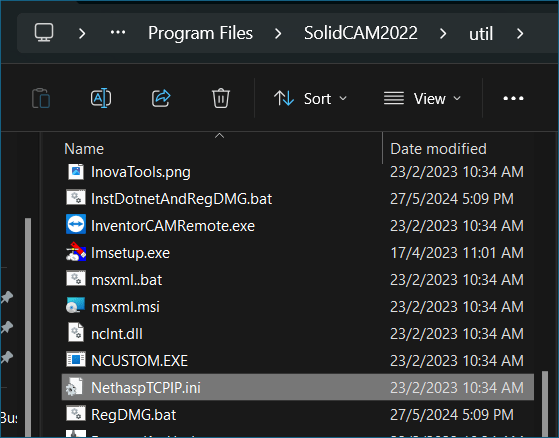
a. Open SolidCAM util directory (i.e. C:\Program Files\SolidCAM20XX\Util)
b. Find the file called ‘NethaspTCPIP‘ and rename it to ‘Nethasp‘.
- Copy the file to the main SolidCAM directory (i.e. C:\Program Files\SolidCAM20XX\)
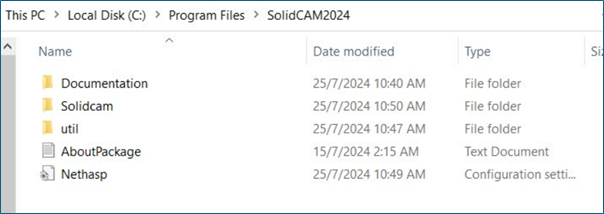
- Open the copied file and find the parameter “NH_SERVER_ADDR”.
- Write the IP of the server (i.e. NH_SERVER_ADDR = 192.168.XXX.XX) and save it.

3. Test Connection: Verify that the client computer can connect to the license server and check out a license. This may involve restarting SolidCAM or the client computer.
If you have any more challenges while installing SOLIDCAM Network Dongle, you may reach out to [email protected] for assistance.
If you found this helpful, we’d love for you to share it!