What is SolidNetwork License Manager Server?
The SolidNetwork License Manager (SNL) Server is a tool used by organizations to manage and distribute licenses for SOLIDWORKS products across a network. This server-based solution allows multiple users to share a pool of licenses, rather than requiring individual licenses for each user.
Why is SolidNetwork License Manager Important?
- Centralized License Management: It simplifies the management of multiple licenses by centralizing control, making it easier to allocate, track, and manage licenses.
- Cost Efficiency: Reduces the cost of purchasing individual licenses for each user. Instead, a pool of licenses can be shared among multiple users, optimizing resource utilization.
- Flexibility: Provides flexibility for users to access SOLIDWORKS from different machines within the network if licenses are available.
- Scalability: Easily scalable to accommodate more users by adding additional licenses to the pool as the organization grows.
- Enhanced Productivity: Ensures that licenses are utilized efficiently, preventing situations where licenses remain unused on some machines while others need them.
How to Transfer SolidNetwork License Manager to a New Server
**Before starting the transfer, make sure all licenses are not being used and returned to the server.
Step 1: Deactivate Licenses on the Current Server
1. Open the SolidNetwork License Manager on the current server.
2. Go to the “Server Administration” tab and select “Modify” to start the deactivation process. Follow the prompts to deactivate the licenses.
- Click on “Modify”.

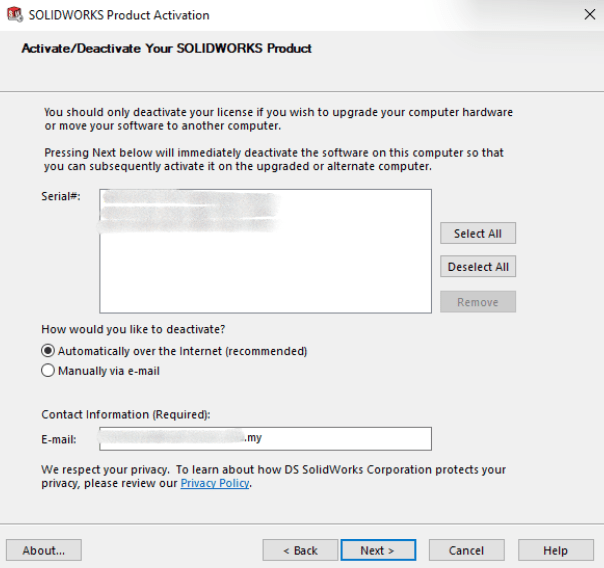
- Choose to “Move your product license(s) to a new/upgraded computer.
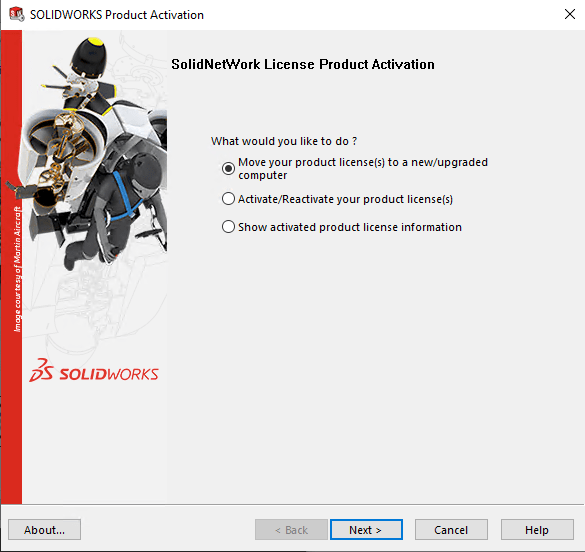
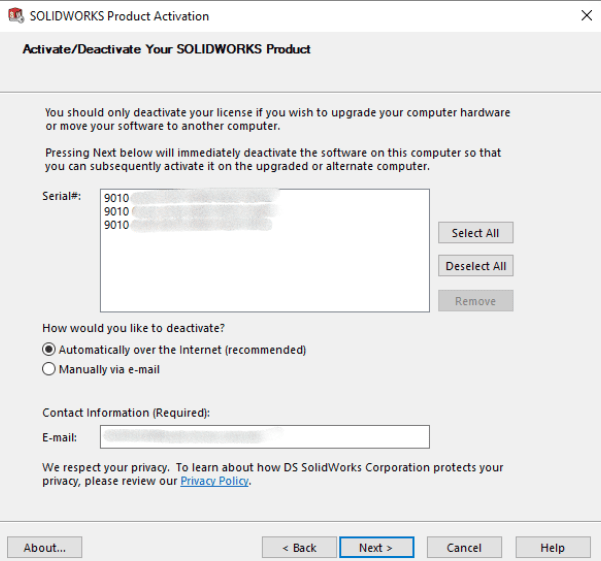
- Click on “Select All” to deactivate all the license from the server. Key-in the email address and Proceed “Next”.
Step 2: Install SolidNetwork License Manager on the New Server
1. Download the SolidNetwork License Manager installer from the SOLIDWORKS Customer Portal or from the installation media.
2. Run the installer on the new server.
3. Follow the instructions in the installation wizard. Choose the appropriate options for your network setup.
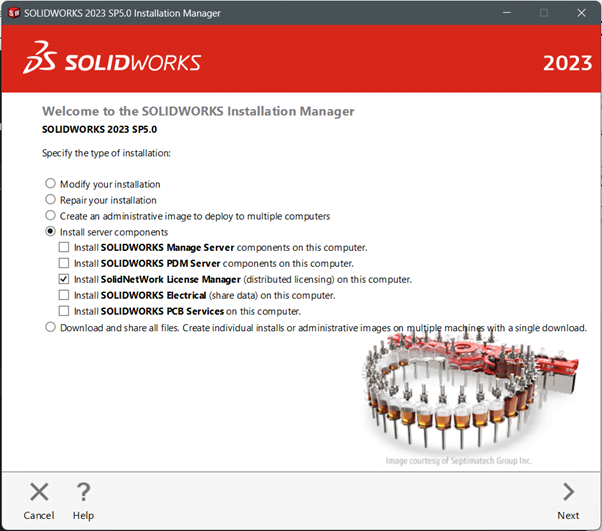
- On the Installation Manager screen select “Server Products” then select “Install SolidNetwork License Manager” and click on Next.
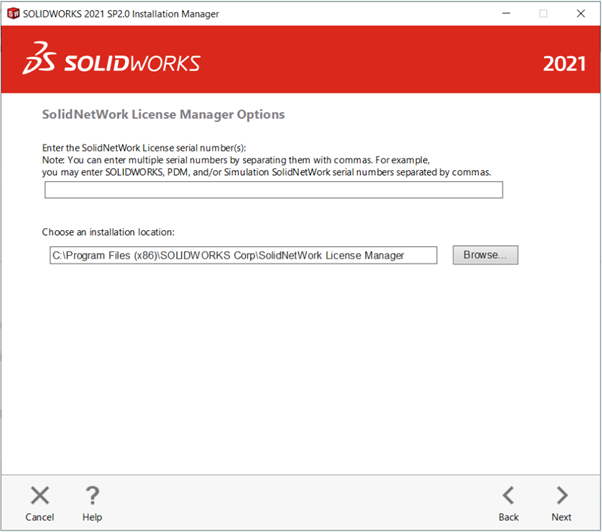
- Key-in all the product licenses available.
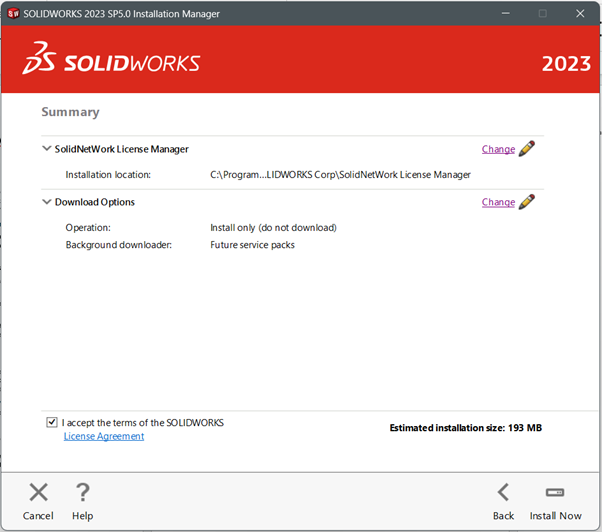
- Click “Install Now” to proceed with installation.
Step 3: Activate Licenses on the New Server
1. Open the SolidNetwork License Manager on the new server.
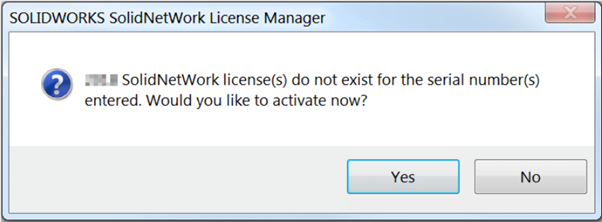
2. Since there is no license activated, you will be prompted to activate your license(s). Select “Yes”.
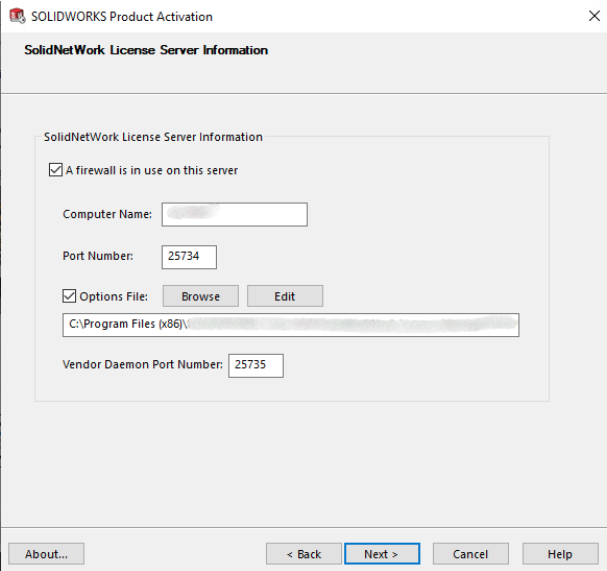
3. The SolidNetwork License Activation Wizard dialog box will appear. We suggest using all the default values listed on this page unless the ports here are currently in use by other software. Also, it is recommended to select “A firewall is in use on this server”. This will allow the SolidNetWork License Manager to work through a firewall, using only ports TCP 25734 and 25735 inbound to the server.
4. Choose “Select All” to activate all licenses. Key-in the email address and Proceed “Next”.
Step 4: Update Client Computers
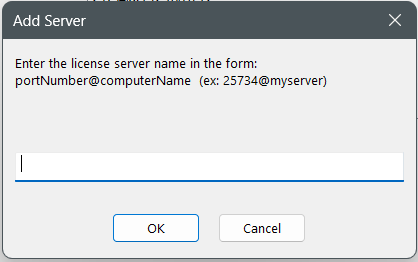
1. On each client computer, open SolidNetwork License (SNL) Manager Client and go to “Server List” tab.
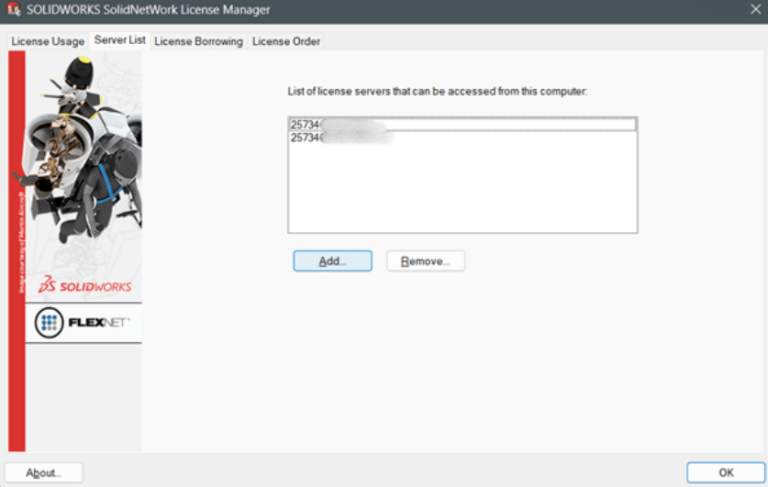
2. Update the server’s name to point to the new server where the SolidNetwork License Manager is now installed.
If you encounter issue with the automatic deactivation of SOLIDWORKS Network License, you may reach out to [email protected] for assistance.
If you found this blog post helpful, we’d love for you to share it!


