This guide outlines the procedure to modify SOLIDWORKS license key for client.
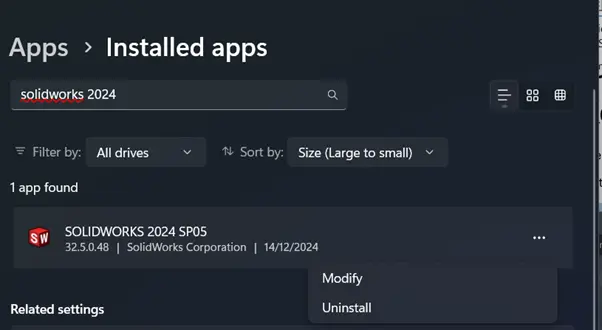
1. In client computer, launch ‘Add or Remove Program’.
2. Settings window will open.
a. Search for ‘SOLIDWORKS XXXX’. b. Click ‘triple dots’. c. Click ‘Modify’.
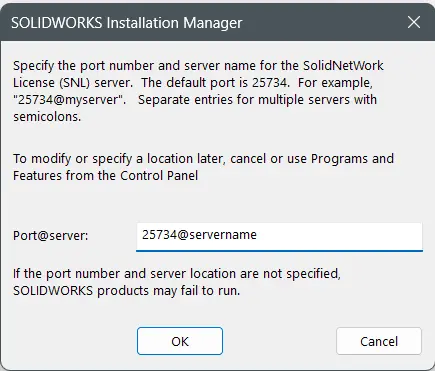
3. SOLIDWORKS Installation Manager window will open.
a. Click ‘OK’. b. Choose ‘Modify your installation’. c. Click ‘Next’.
4. ‘Serial Number’ section will open.
a. Modify the desired serial key. b. Click ‘Next’.
5. ‘Product Selection’ section will open. Depending on which license you modify/add, there will be additional products that need to be installed. Click ‘Next’.
6. ‘Summary’ section will open. Click ‘Modify Now’.
Note: If you are utilizing network license, this window will open up. Click ‘OK’.
7. Your SOLIDWORKS license key for client is now successfully modified.
If you encounter an issue while modifying SOLIDWORKS license key for client, you may contact [email protected] for assistance.
If you want to learn more about common questions, you can browse the FAQ from SOLIDWORKS here.
If you found this helpful, we’d love for you to share it!
Transform Your Business With Us Through Cutting-Edge 3D Software
Experience the power of advanced technology and gain a competitive edge in the market. Request a demo today or contact us to get started on your journey towards success!