OVERVIEW
Have you ever experienced unexpected issues with your SOLIDWORKS application? Instances like your program crashing or something performing out of the usual? If so, you’ve probably tried to contact your local SOLIDWORKS technical support and went back and forth with each other just because of collecting information. Some of which can be done prior to contacting your local support. This can be achieved through problem capturing, which is a feature available in SOLIDWORKS Rx.
This guide will show you how to properly utilize this feature in SOLIDWORKS Rx to reduce needless exchanges between you and your local support.
What is Problem Capture?
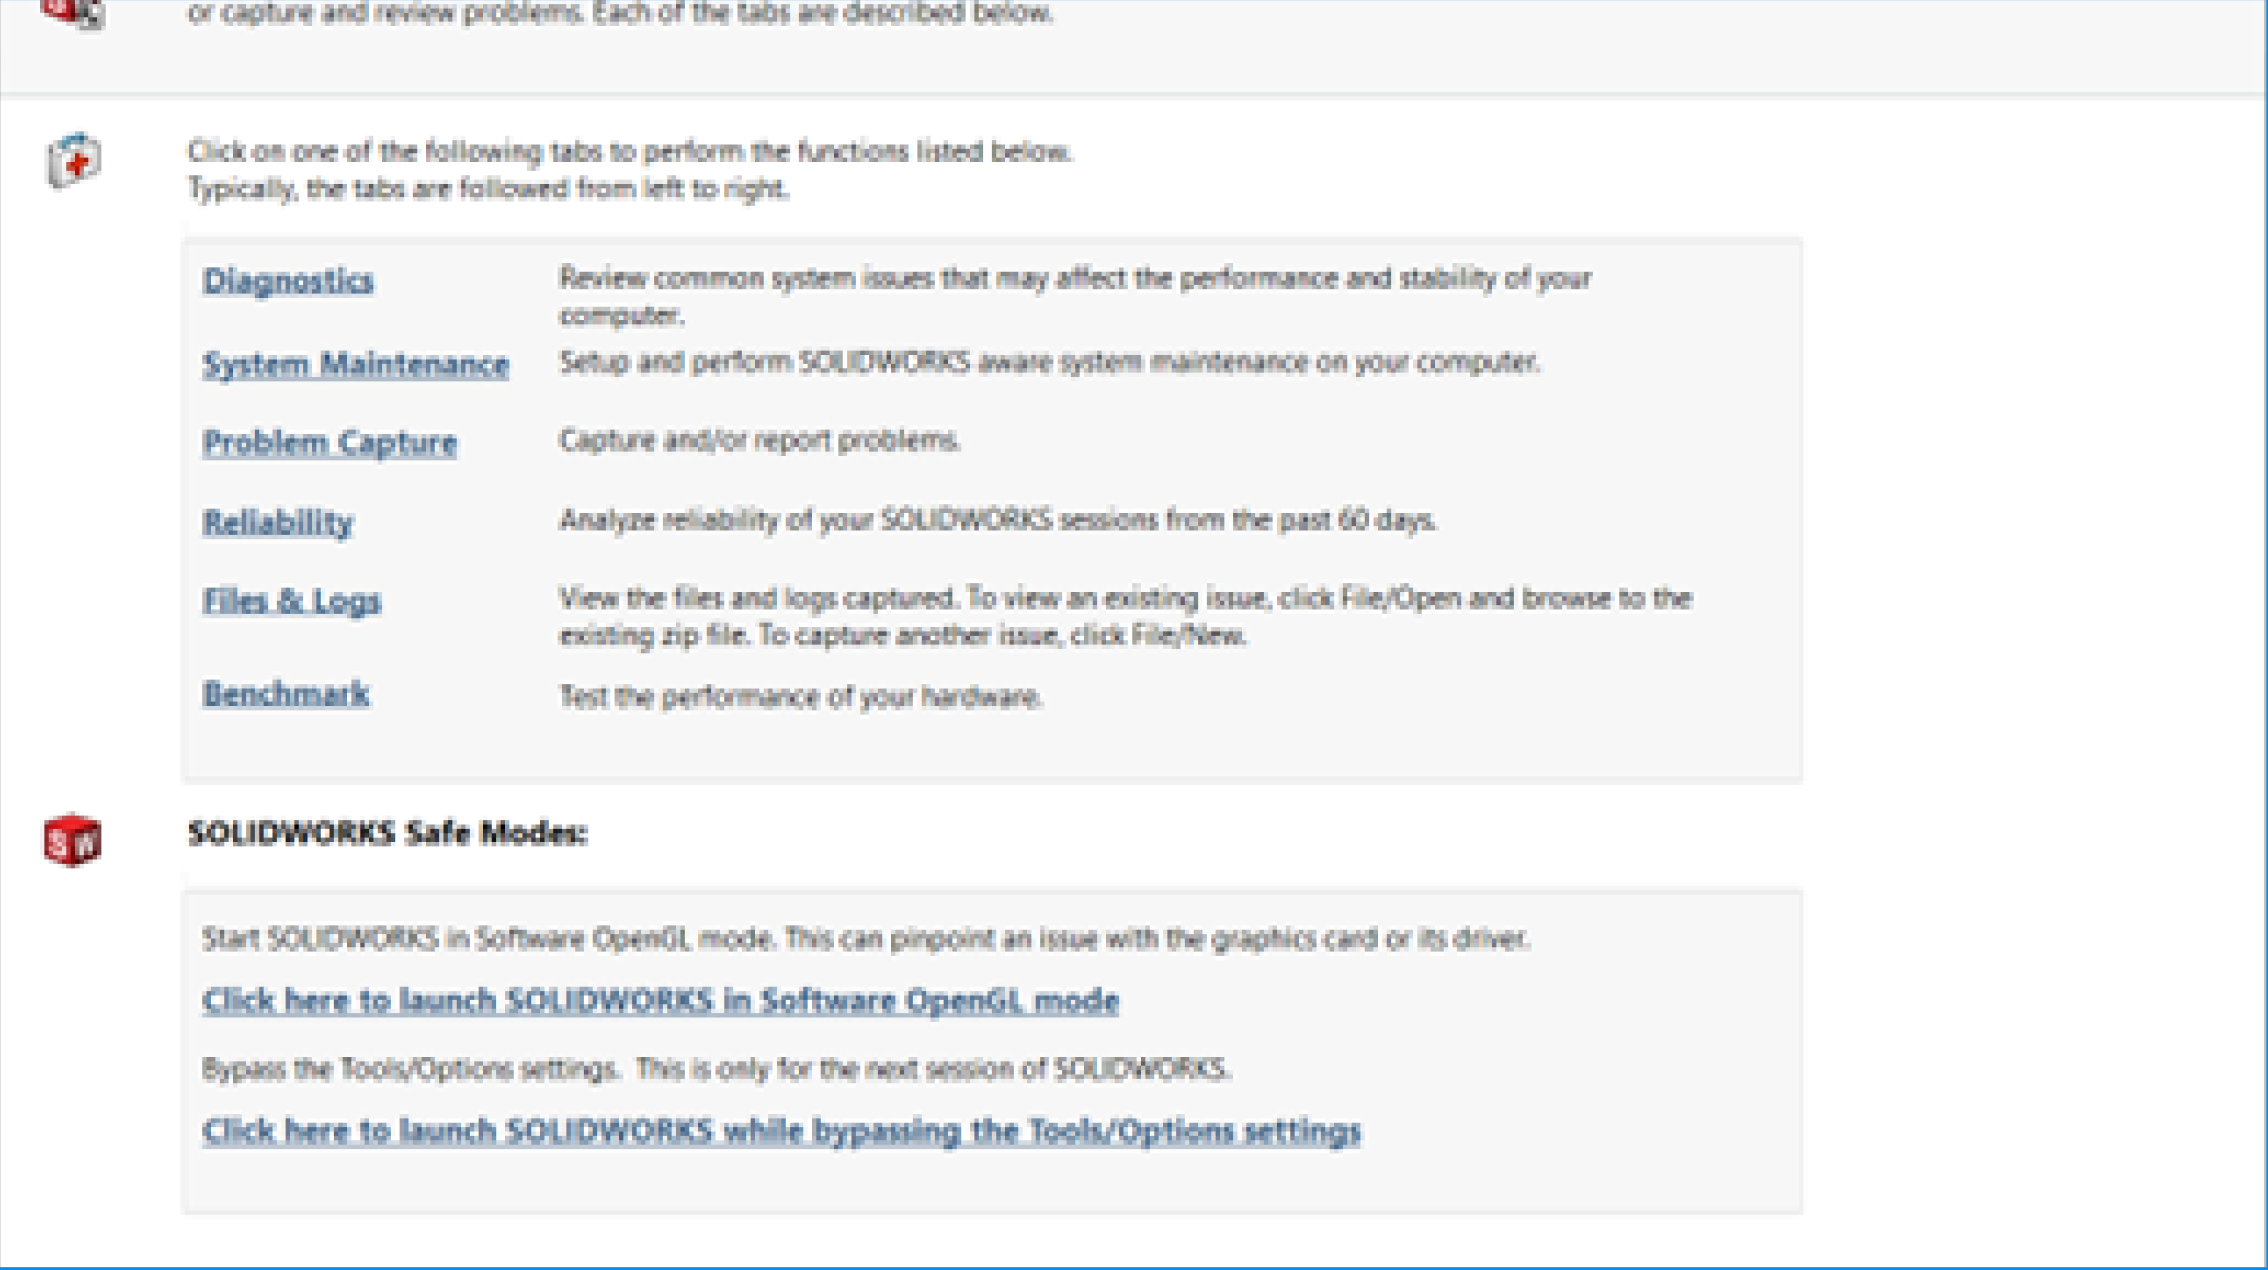
Problem Capture is one of the built-in capabilities of SOLIDWORKS Rx where you can:
- Record a video of the problematic steps that are causing glitches or crashes.
- Log performance profiling data including disk and CPU activity from running processes.
- Write a description of the problem faced.
- Package your SOLIDWORKS files.
All these are then compiled into a ZIP folder that you can send directly to your local tech support to speed up the troubleshooting process.
Now that you understand what it is and what it does, let’s jump straight into the “how-to” part.
Launching Your SOLIDWORKS RX
If you are using SOLIDWORKS Desktop, the quickest way to open the app is to just type “SOLIDWORKS Rx 20XX” in the Windows search bar based on the SOLIDWORKS version you currently own.
Or you can follow the usual file path: Start > All Programs > SOLIDWORKS 20xx > SOLIDWORKS Tools > SOLIDWORKS Rx 20xx.

For users who are using SOLIDWORKS Connected (3DEXPERIENCE SOLIDWORKS), you will have to access SOLIDWORKS Rx through the SOLIDWORKS application instead.
To do this, open the SOLIDWORKS app and click on the question mark icon located at the top right of your interface, then select SOLIDWORKS Rx shown in the dropdown bar.
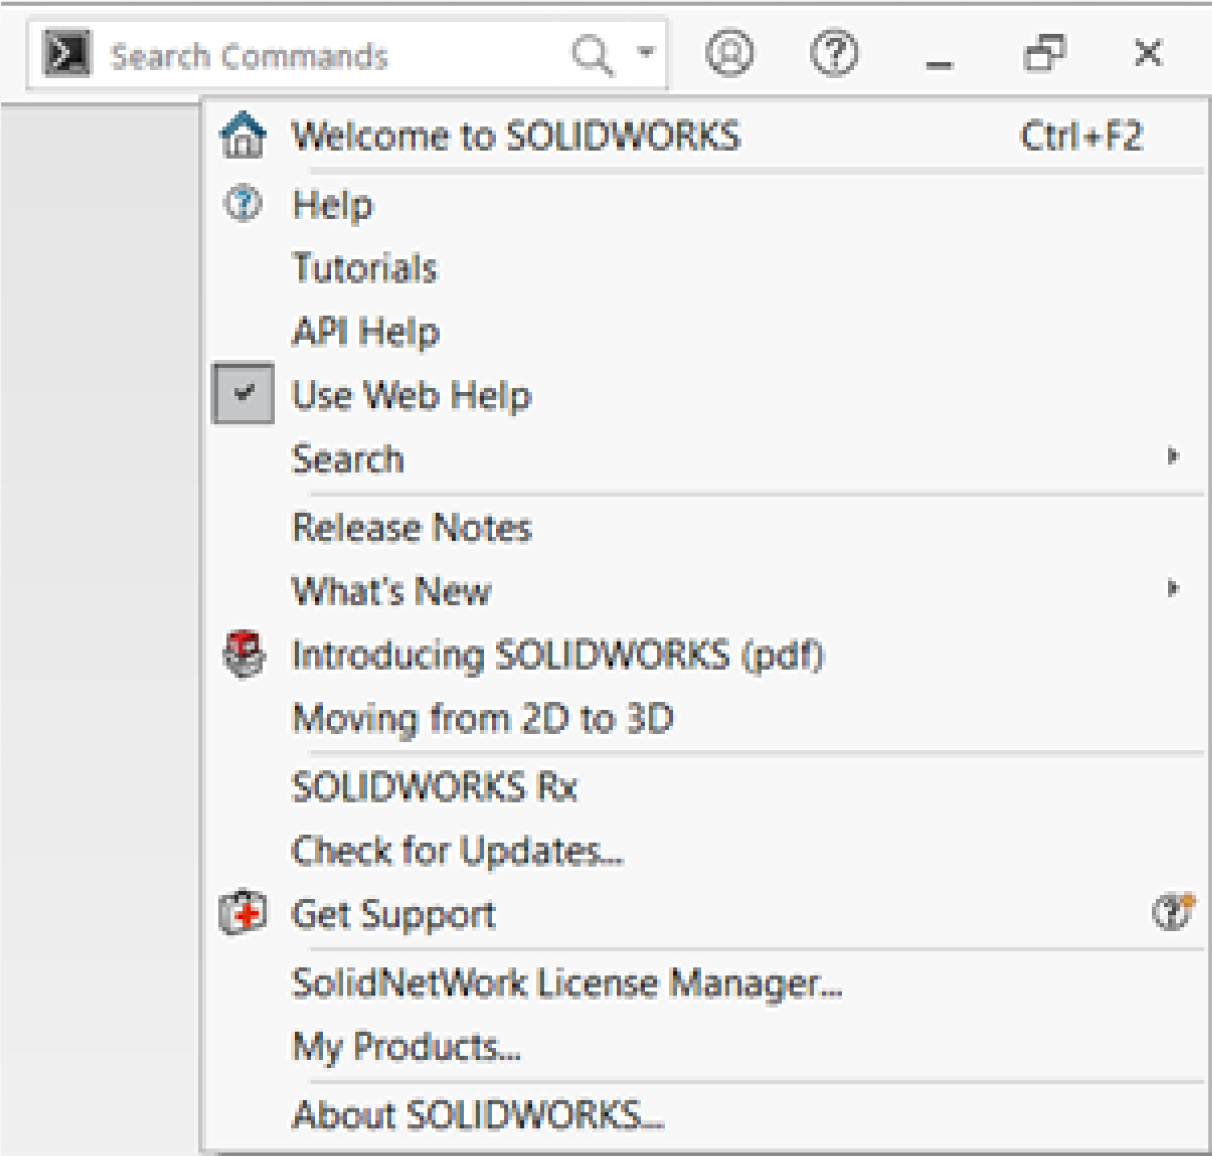
If it doesn’t show up in the dropdown list, the alternative is to directly search for it using the command search bar.
Problem Capture with SOLIDWORKS RX
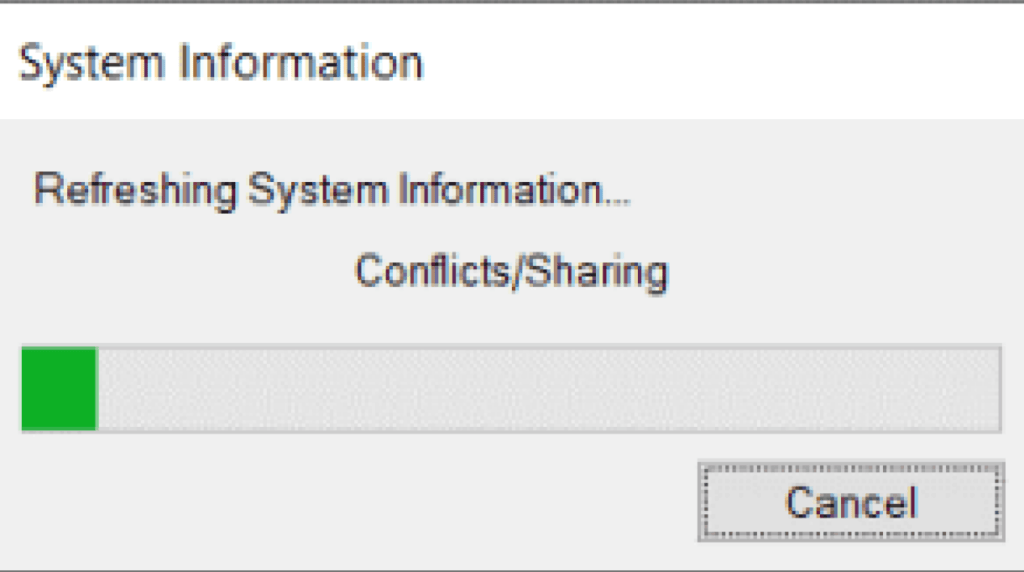
Click on the “Problem Capture” tab and the “System Information” dialog will pop up. Do not cancel it as the tool is gathering system information and packaging it automatically for you.
Capturing The Problem
Before you begin to capture the problem, you must specify which source it is from.
This is important as it can be issues coming from other applications instead. For example, SOLIDWORKS Electrical, SOLIDWORKS Composer, etc.
Here we’ll be selecting SOLIDWORKS as our option. Proceed to click on “Record Video” to start capturing.

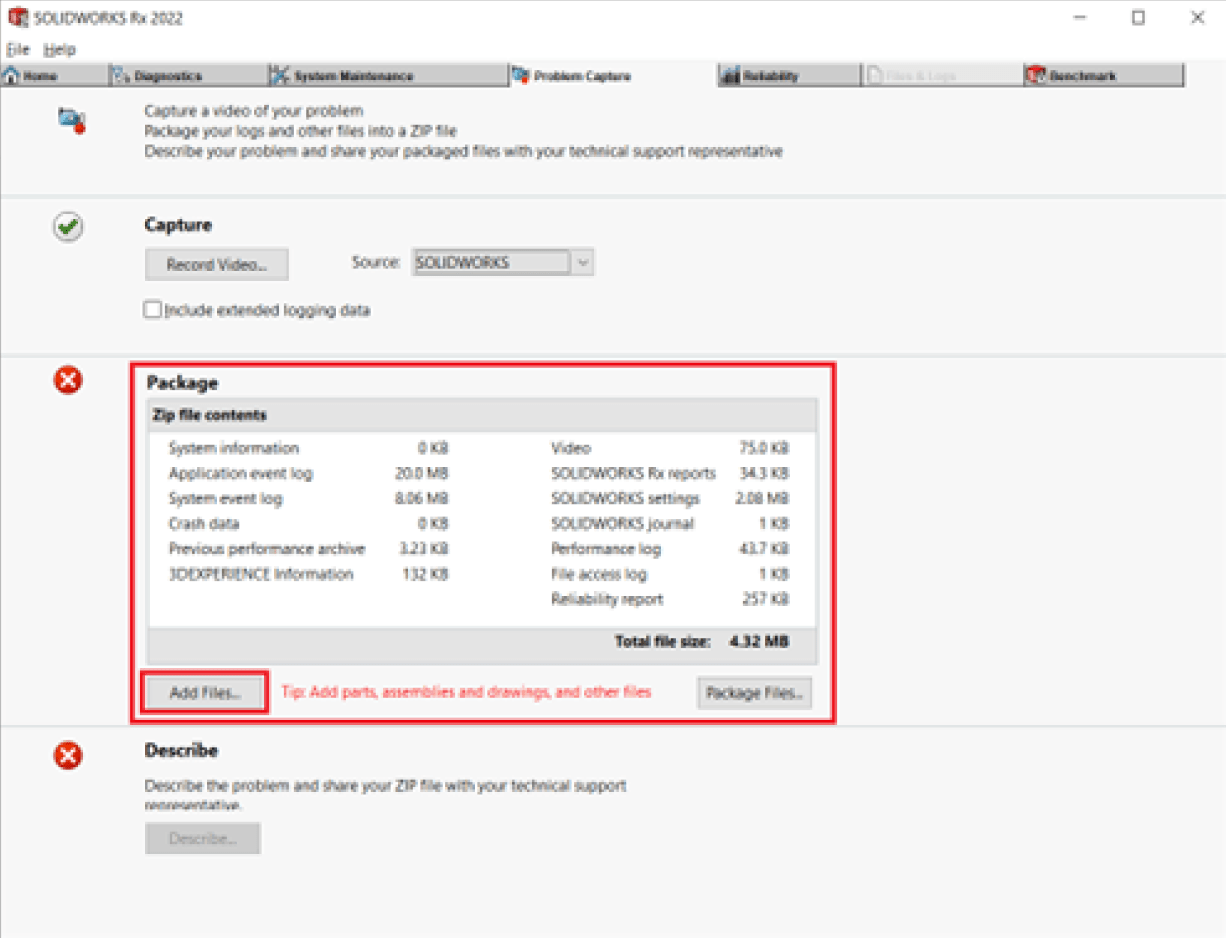
Packaging The Files
The package section (as the name suggests) is where you package your files into zip format.
Here, you will see a summary of all the information that will be included in the final ZIP file.
Click on “Add Files” to add any additional files that you would like to be included.