
The SOLIDWORKS Drawing Template is a tool to help users standardize CAD drawings. A drawing template on its own is basically a set of standards used for drawing and dimensioning parts.
Now you may ask, how do I create a template and edit it according to my own needs?
In this step-by-step guide, we will be covering these few topics to help you get started with a SOLIDWORKS Drawing Template.
- Drawing Sheets and Sheet Formats
- Creating Drawing Templates
- Using a Saved Drawing Template
- Editing a Drawing Template
Drawing Sheets and Sheet Formats
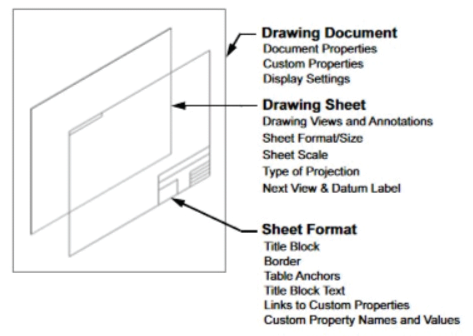
Before we jump in, here is a bit of information about how SOLIDWORKS drawings work. It consists of two distinct layers which are the Drawing Sheet and the Sheet Format.
The Drawing Sheet is where the views of your parts and assembly show up, alongside any dimensions, annotations, and markups.
Sheet Format (*.slddrt) on the other hand contains the border, title block, sheet size, and other relevant information that can be customized and edited to match your company standards respectively.
Here is an illustration of the two separate layers to better visualize and understand how these file formats work.
Following the same basis, the drawing file (*.slddrw) is derived from the combination of a drawing template, drawing sheet, and sheet format altogether.
Creating Drawing Templates
To begin, open up SOLIDWORKS and select the file path: File > New > Drawing to create a new drawing document.
Add any required drawing views to the sheet you have opened such as the front, top, and right views. You can do this by selecting the view type from the View Palette and dragging it onto the sheet.
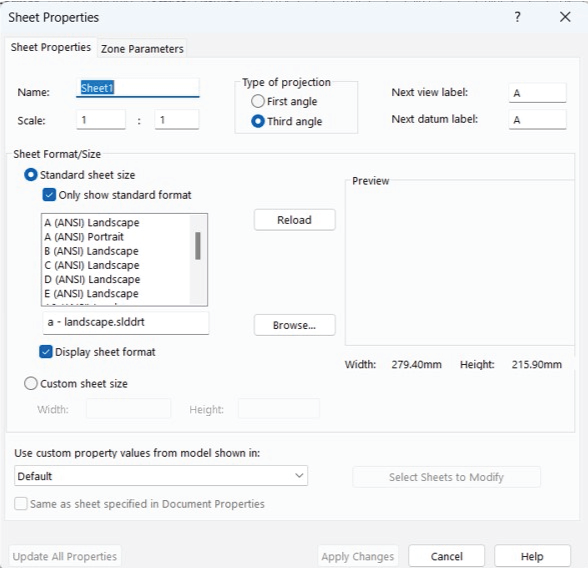
Customize the sheet properties by selecting the Sheet Properties button in the Property Manager. Here, you can set the sheet scale, title block, and any other sheet properties you like.
Don’t forget to add any necessary annotations such as dimensions, notes, as well as symbols to the sheet.
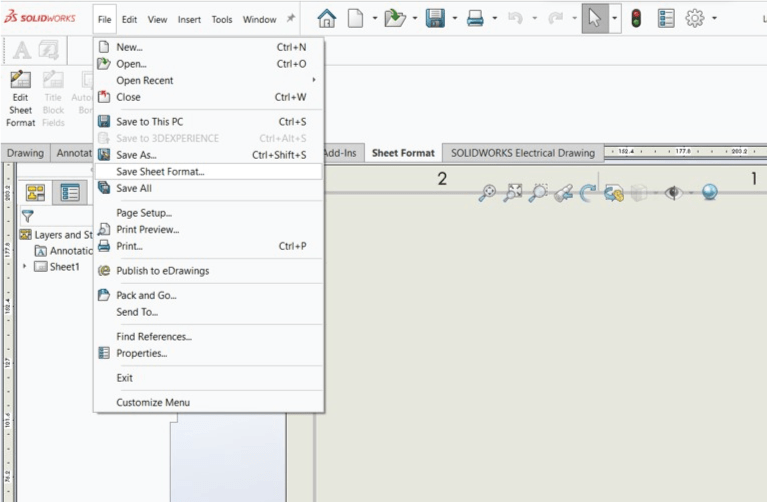
Once you have customized the sheet to your liking, you can now save it as a template by selecting the path: File > Save As.
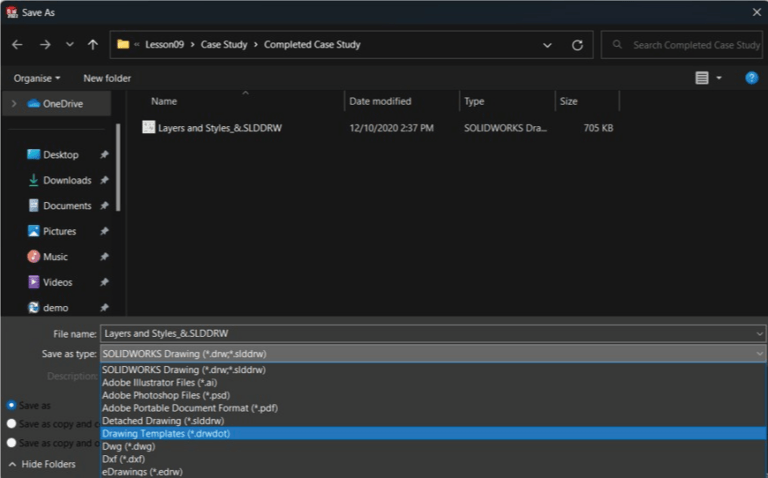
Since we are saving it to be used as a template, don’t forget to choose the file type (*.sslddrt) instead of your normal (*.drw,*.slddrw) format.
Using a Saved Drawing Template
Now that you have a sheet template saved, select File > New > Drawing and find back the template that you have just created. It will show up on a list of available templates on your local computer.
From then on, you can customize the new drawing by adding your specific model views, dimensions, and annotations.
Once finished, save your completed drawing as a new file by selecting File > Save As, and don’t forget to choose the (*.drwdot) file format.
Give the drawing a descriptive name and save it in a location where you can easily find it in the future. The recommended path is specified under Tools > Options > System Options Tab > File Locations > Templates.

Editing a Saved Drawing Template
Having a proper drawing template saved in SOLIDWORKS means that you can make changes to it whenever you want.
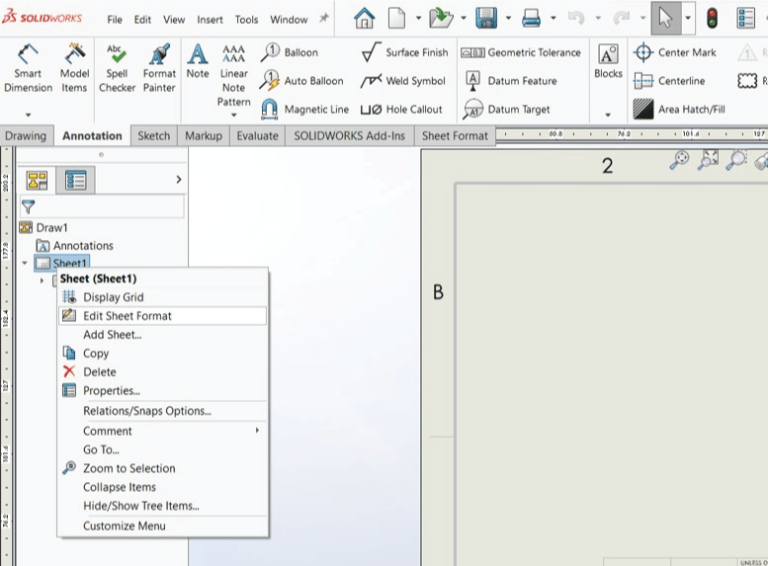
To do so, start by opening up the SOLIDWORKS application and creating a new drawing document.
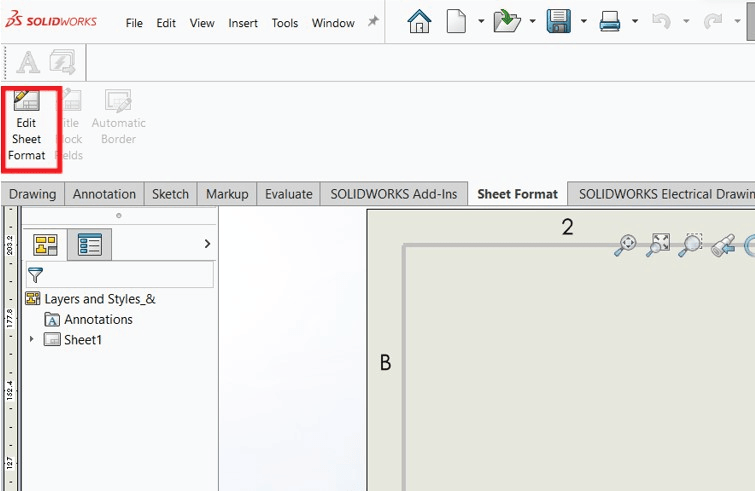
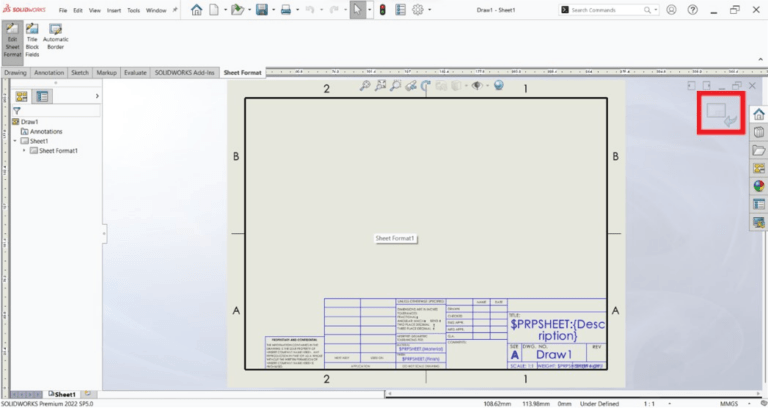
Move to the Sheet Format tab in the Property Manager and then click on “Edit Sheet Format” to enter the editing mode for the sheet format.
Once you’re in editing mode, make changes to the title block, border, and other elements of the sheet format by selecting them and then using editing tools such as drag-and-drop, copy/paste, and modifying dimensions.
To add or remove elements from the sheet format, use the “Insert” and “Delete” commands found in the same tab.
After making all the necessary changes, click on “Exit Sheet Format” to save the changes to your template.
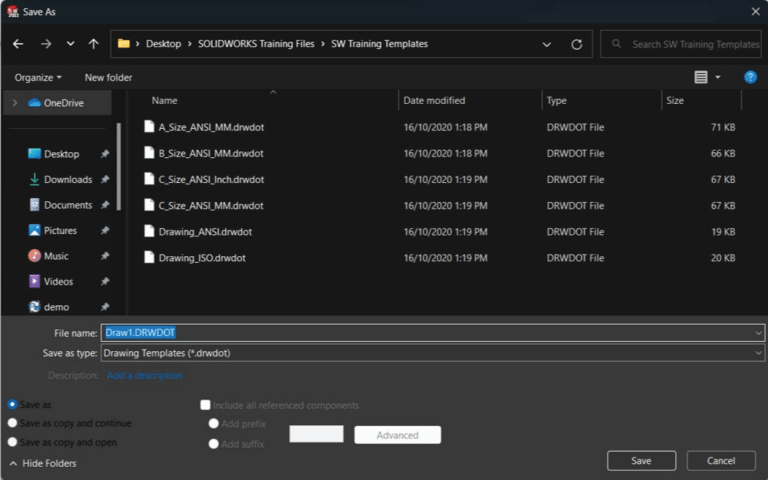
Save the updated template by selecting File > Save As and choosing the (*.slddot) file format. Make sure to save it in the same locations as the original template or in a new location if you are looking to create a new version of the template.
To apply the updated drawing template to a new drawing, select File > New > Drawing and choose the updated template from your list of available templates.
Hope you found this guide helpful and don’t forget to subscribe to our newsletter to receive the latest information, trends, and guides, all surrounding SOLIDWORKS and the engineering industry.